Build MCP Servers Fast: 5 Steps with FastMCP in Python (2026)
The Model Context Protocol (MCP) is a powerful standard for connecting Large Language Models (LLMs) to external data and tools, acting like a universal bridge for AI interactions. If you're a Python developer looking to enhance your AI workflows, FastMCP is the go-to library to simplify building MCP servers. In this blog, we'll walk through setting up a basic MCP server using FastMCP, complete with a practical example to get you started.
What is FastMCP?
FastMCP is a Pythonic, high-level framework that abstracts the complexities of the MCP protocol, such as server setup, protocol handlers, and error management. It allows you to focus on building tools and resources for LLMs using simple Python functions and decorators.
What is MCP? The Model Context Protocol (MCP) is a set of rules that lets AI models connect to external data and tools. Use MCP when you need your AI to:
- Fetch External Data: Query databases or APIs
- Run Custom Tools: Execute tasks you've programmed
- Enhance AI Capabilities: Combine AI with your systems for real-world results
Prerequisites
- Python 3.10+ installed
- A terminal (macOS/Linux) or PowerShell/CMD (Windows)
- Basic familiarity with Python and virtual environments
- (Optional) An MCP-compatible client like Claude Desktop or Cursor
Step 1: Install FastMCP
The recommended way to install FastMCP is using uv, a fast Python package manager:
# On macOS/Linux
curl -LsSf https://astral.sh/uv/install.sh | sh

# On Windows (PowerShell)
powershell -c "irm https://astral.sh/uv/install.ps1 | iex"
After installing uv, create a project directory:
mkdir my-mcp-server
cd my-mcp-server
uv init
uv venv
source .venv/bin/activate  # On Windows: .venv\Scripts\activate
Install FastMCP:
uv pip install "mcp[cli]"
Verify the installation:
uv run mcp --version
Step 2: Create a Simple MCP Server
Create a file named server.py:
from mcp.server.fastmcp import FastMCP

# Initialize the MCP server with a name
mcp = FastMCP("CalculatorServer")

# Define a tool to add two numbers
@mcp.tool()
def add(a: int, b: int) -> int:
    """Add two numbers and return the result."""
    return a + b

# Run the server
if __name__ == "__main__":
    mcp.run(transport="stdio")
This code:
- Imports FastMCP from the MCP library
- Creates a server instance named "CalculatorServer"
- Defines a tool called
addusing the@mcp.tool()decorator - Runs the server using the stdio transport
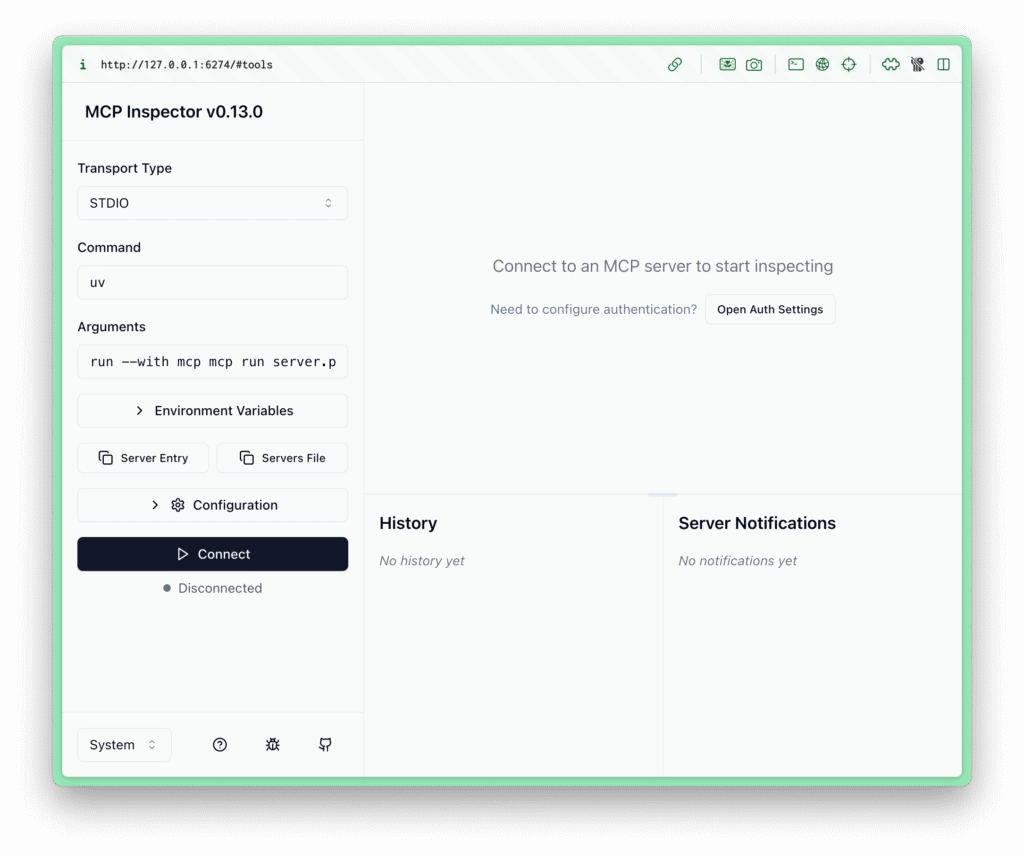
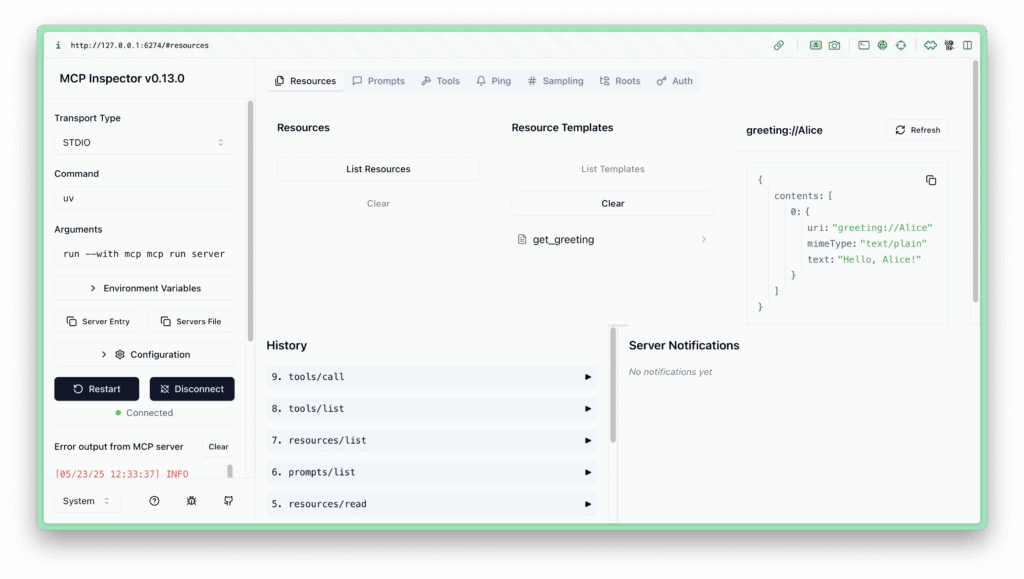
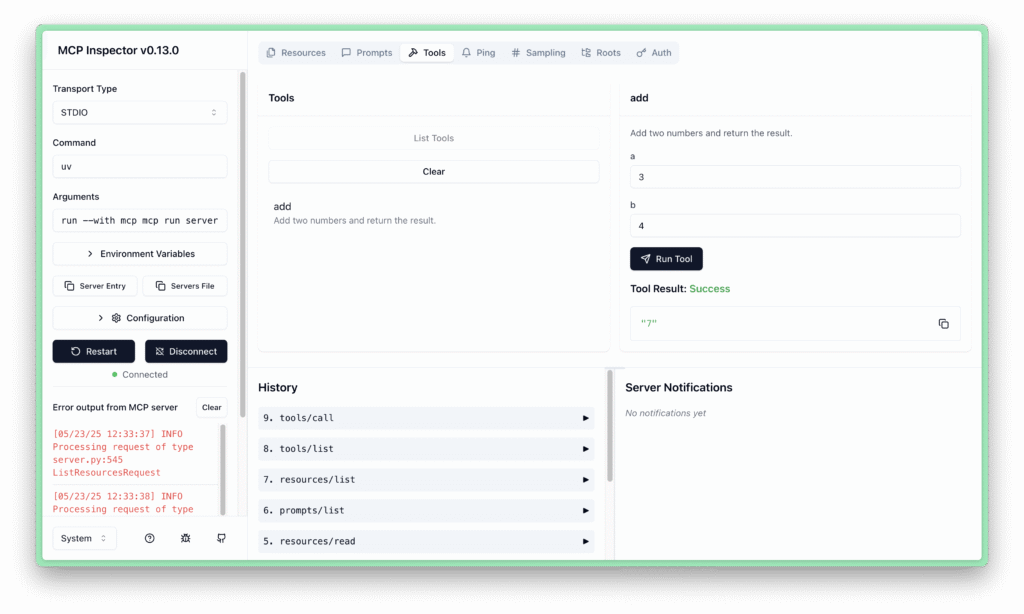
Step 3: Test the Server with MCP Inspector

Start the server in development mode:
uv run mcp dev server.py
This launches the MCP Inspector in your browser (typically at http://127.0.0.1:6274).
- Click Connect to link to your server
- In the Tools tab, you'll see the
addtool listed - Enter values (e.g., a=4, b=3) and select Run Tool to test
Step 4: Integrate with an LLM Client (Optional)
Note: Step 3 used
mcp devwhich launches the visual MCP Inspector for interactive testing. Here we usemcp runwhich starts the server in production mode (stdio transport) for connecting to an LLM client.
To see your server in action with an LLM, integrate it with Cursor:
- Open your project directory in Cursor
- Go to File → Preferences → Cursor Settings → MCP → Add New Server
- Configure the server:
- Name: "Calculator"
- Type: Command
- Command:
uv run mcp run /path/to/your/server.py
- Save the configuration
- In Cursor's chat, type: "Add 5 and 3." The LLM should call your tool and return 8.
Step 5: Expand Your Server
Add more tools or resources. For example, a greeting resource:
# Add to server.py
@mcp.resource("greeting://{name}")
def get_greeting(name: str) -> str:
    """Return a personalized greeting."""
    return f"Hello, {name}!"
Copy-and-Paste Example
Here's a complete, ready-to-run FastMCP server:
from mcp.server.fastmcp import FastMCP

# Initialize the MCP server
mcp = FastMCP("MyFirstMCPServer")

# Define a tool to add two numbers
@mcp.tool()
def add(a: int, b: int) -> int:
    """Add two numbers and return the result."""
    return a + b

# Define a resource for personalized greetings
@mcp.resource("greeting://{name}")
def get_greeting(name: str) -> str:
    """Return a personalized greeting."""
    return f"Hello, {name}!"

# Run the server
if __name__ == "__main__":
    mcp.run(transport="stdio")
How to Run:
- Save the code as
server.py - Ensure FastMCP is installed (
uv pip install "mcp[cli]") - Activate your virtual environment
- Run:
uv run mcp dev server.py - Open http://127.0.0.1:6274 to test
Why Use FastMCP?
- Minimal Boilerplate: Create tools and resources with just a few lines
- Pythonic Design: Uses decorators and type hints
- Powerful Features: Supports async functions, OpenAPI integration
- Debugging Tools: MCP Inspector makes testing straightforward
Next Steps
- Add more complex tools (APIs, databases)
- Deploy to AWS or Cloudflare
- Explore the FastMCP GitHub repository
Happy coding, and enjoy powering your LLMs with FastMCP!
Frequently Asked Questions
What is FastMCP in Python?
FastMCP is a Python framework that makes building MCP (Model Context Protocol) servers fast and simple. Instead of manually writing JSON schemas and protocol handlers, you decorate any Python function with @mcp.tool() and FastMCP handles everything else — schema generation, type validation, and protocol serialization. It's the fastest way to expose Python functions as tools for Claude, Cursor, and other AI clients.
Is FastMCP production ready? Yes. FastMCP v2 is production-ready and actively maintained. It's been adopted by thousands of developers and is the recommended way to build MCP servers in Python. The library supports all MCP primitives (tools, resources, prompts), multiple transport protocols (stdio, SSE, WebSocket), and has solid error handling and type safety via Python type hints.
Who is behind FastMCP?
FastMCP was created by Jeremiah Lowin (GitHub: jlowin), an open-source developer known for the Prefect workflow orchestration library. FastMCP v2 is now the foundation of the official mcp Python package maintained by Anthropic — so the project is effectively co-maintained by Anthropic and the open-source community.
How to build a MCP server using FastMCP?
Install with pip install fastmcp, create a Python file, initialise mcp = FastMCP("my-server"), then add @mcp.tool() above any function you want to expose. Run with fastmcp run server.py. Connect to Claude Desktop by adding the server path to your claude_desktop_config.json. The full setup takes under 10 minutes — see the step-by-step guide above.
Want to work together?
I'm always happy to connect — whether it's a project, a question, or just to say hi.
Get in Touch →